✅Deposit and Withdrawal Tutorial for Nostr Assets
About Nostr:
Nostr (Notes and Other Stuff Transmitted by Relays) is a concise, open-source decentralized social protocol. Its simple and understandable architecture helps you manage information and protects your freedom of speech and expression online. By integrating the Bitcoin Lightning Network, Nostr provides a fresh perspective on the "user-server" relationship.
About NostrAssets:
NostrAssets is an open-source protocol that introduces Taproot assets and Bitcoin Satoshis into the Nostr ecosystem. Once assets are introduced, users can send and receive them at the Nostr protocol layer using Nostr's public and private keys. The settlement and security of assets still rely on the Lightning Network. The NostrAssets protocol itself does not issue assets but introduces them into Nostr through the protocol.
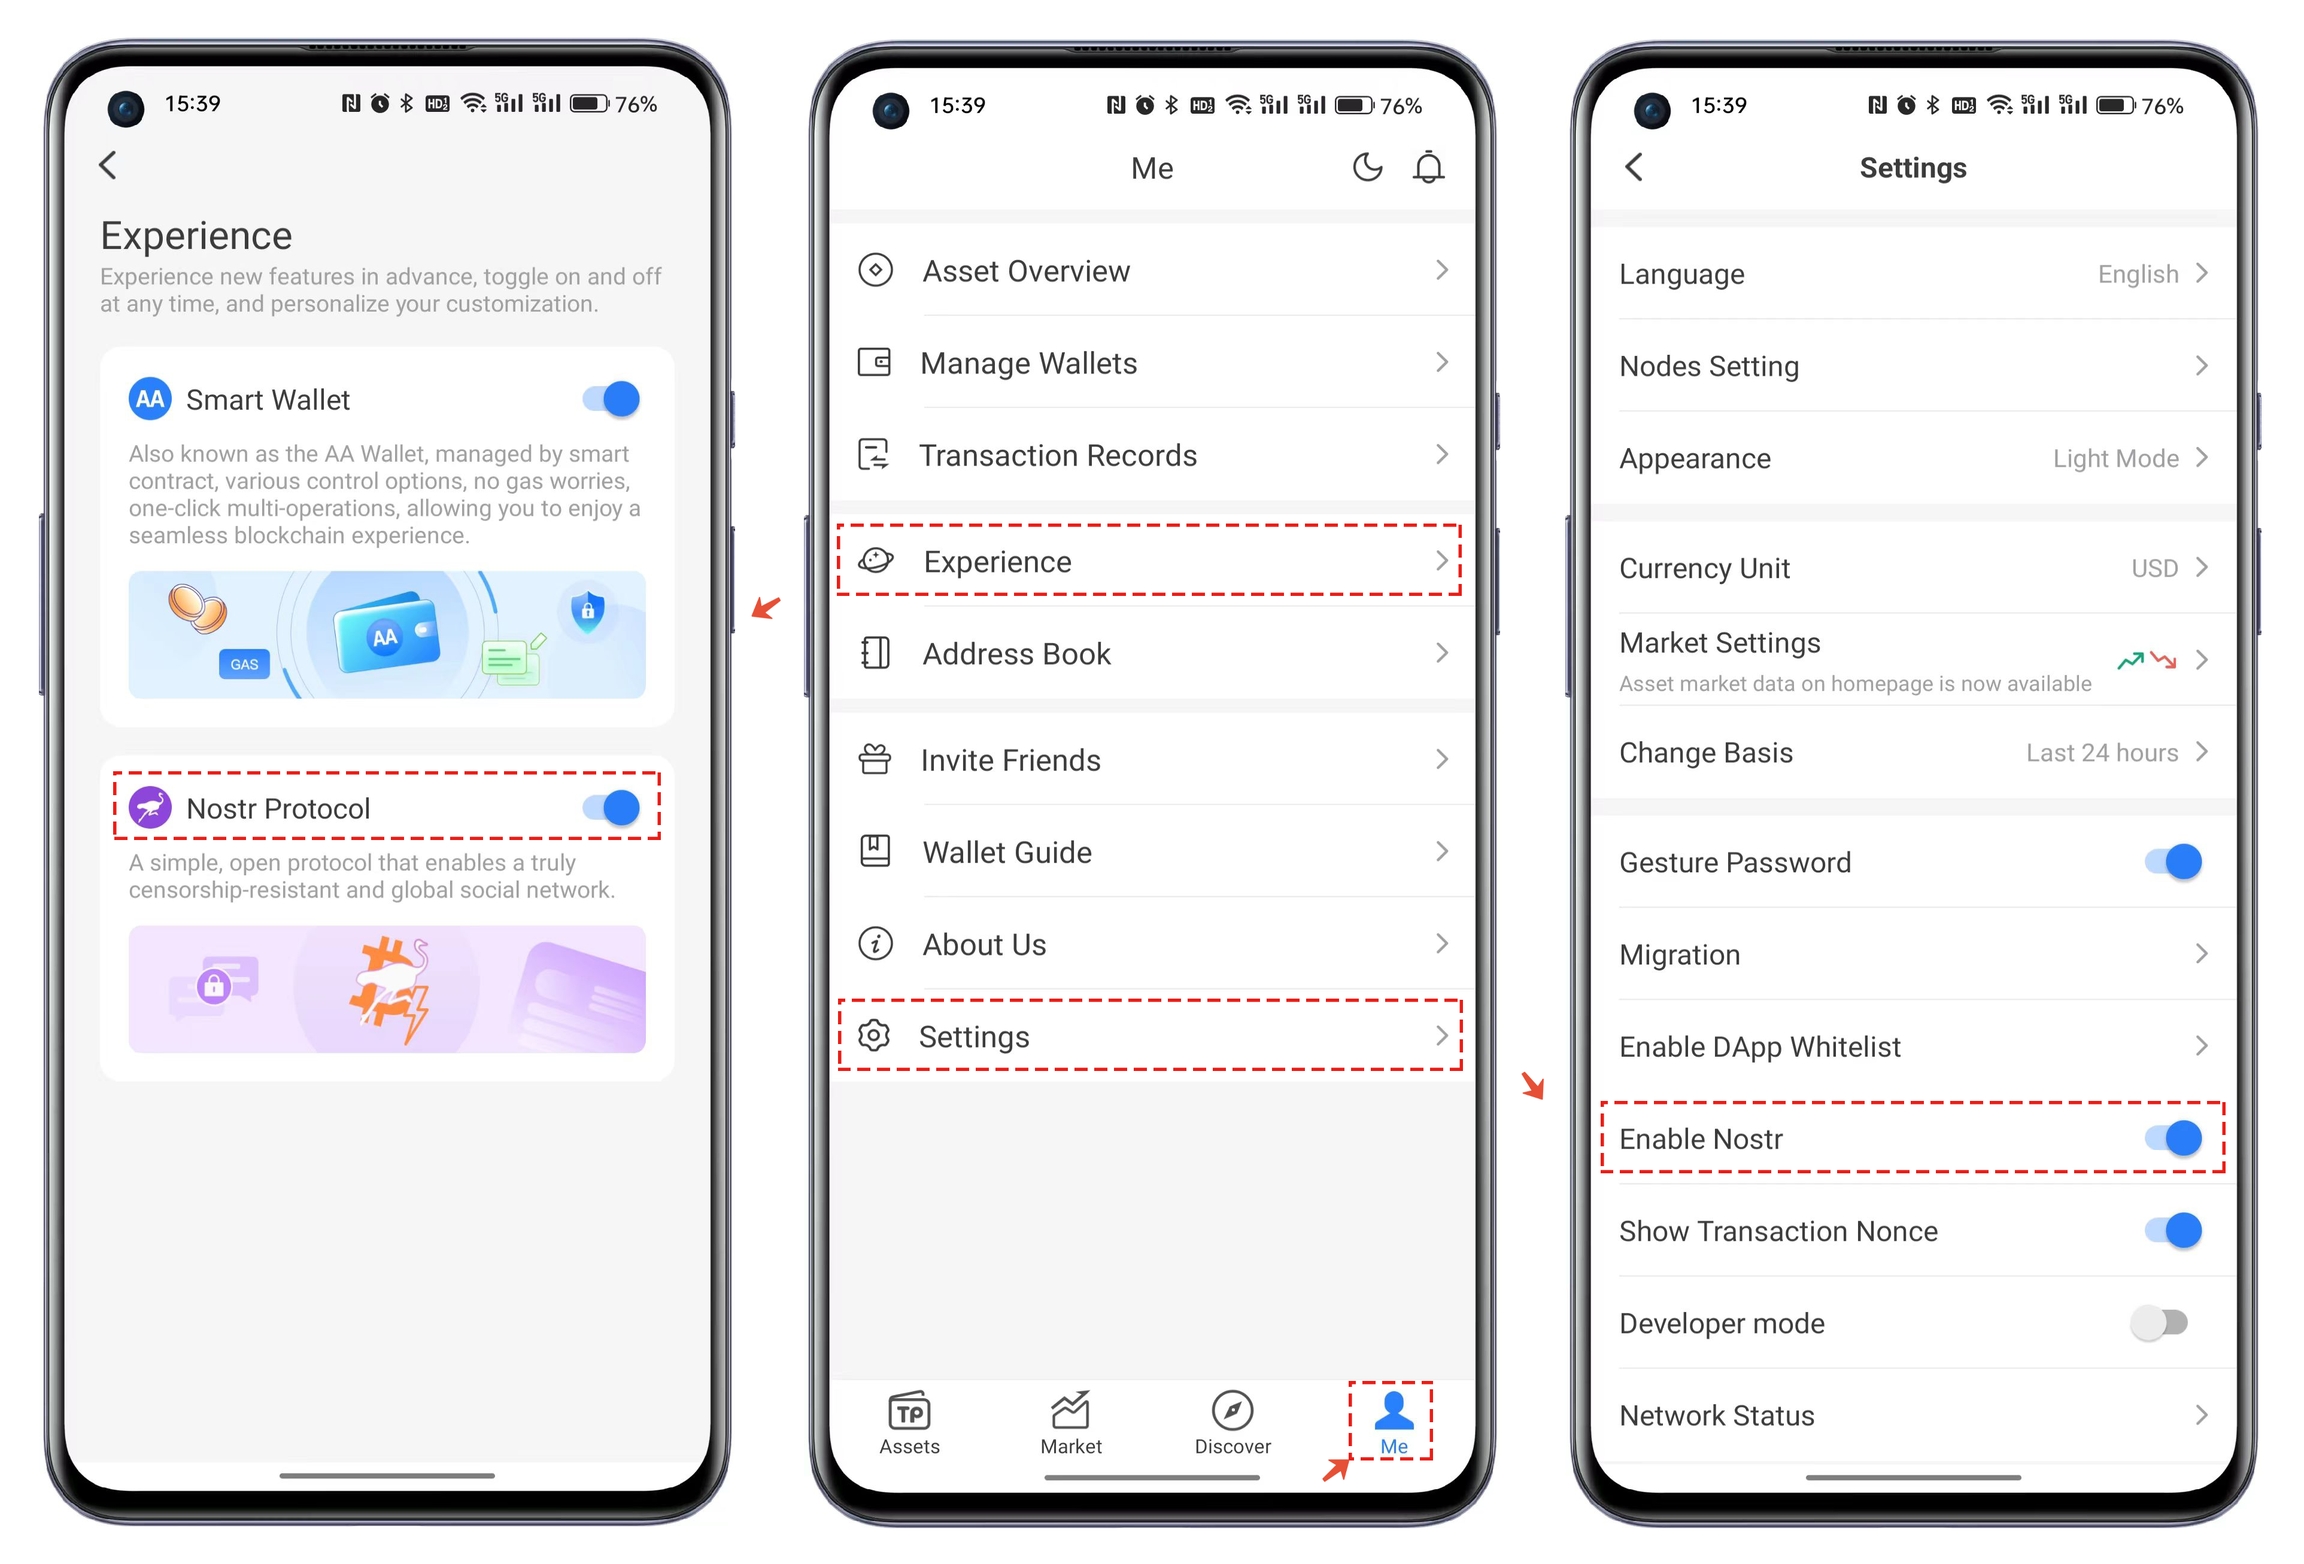
Activating Nostr on TokenPocket:
Open TokenPocket and click on [Mine]. There are two entry points to enable the Nostr protocol. Entry 1: Click on [Experience Zone] and check the Nostr protocol, Entry 2: Click on [System Settings] and check the Nostr protocol.
Withdrawal Tutorial for NostrAssets:
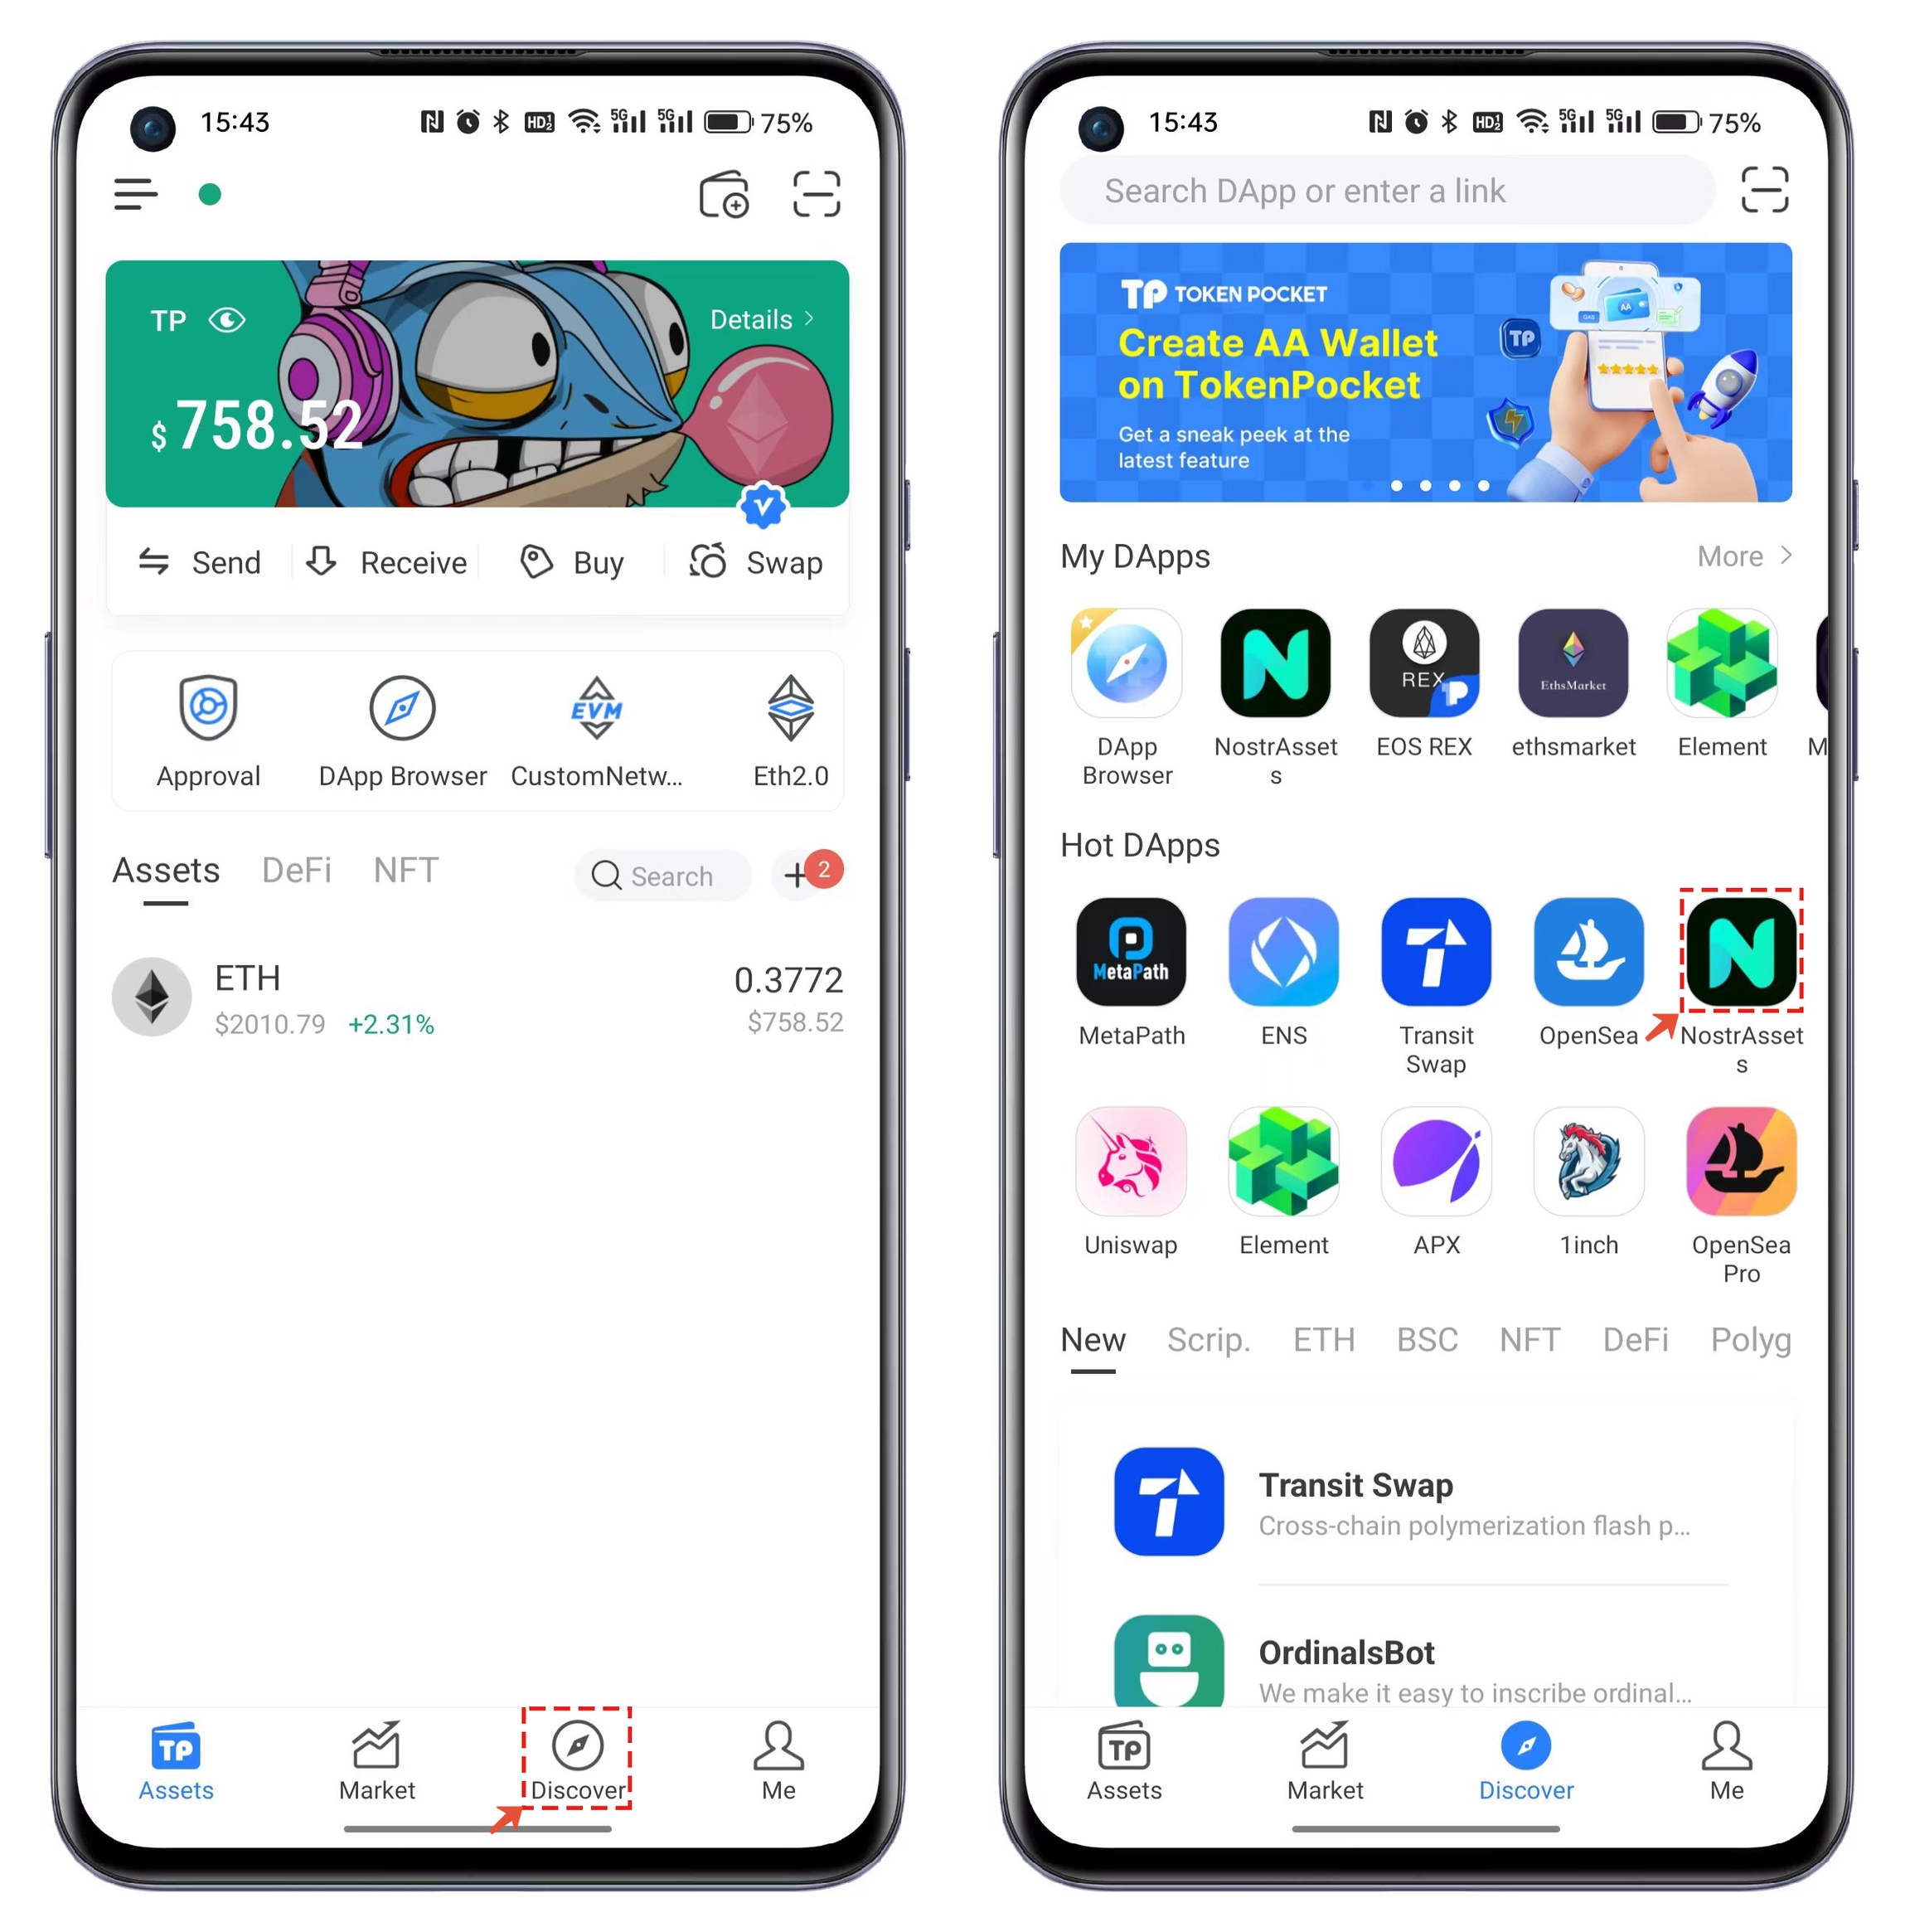
Open TokenPocket and click on to open in the popular DApps. TP Wallet users can search for NostrAssets in the menu or directly open the link through the DApp browser: https://mainnet.nostrassets.com/?utm_source=tokenpocket"
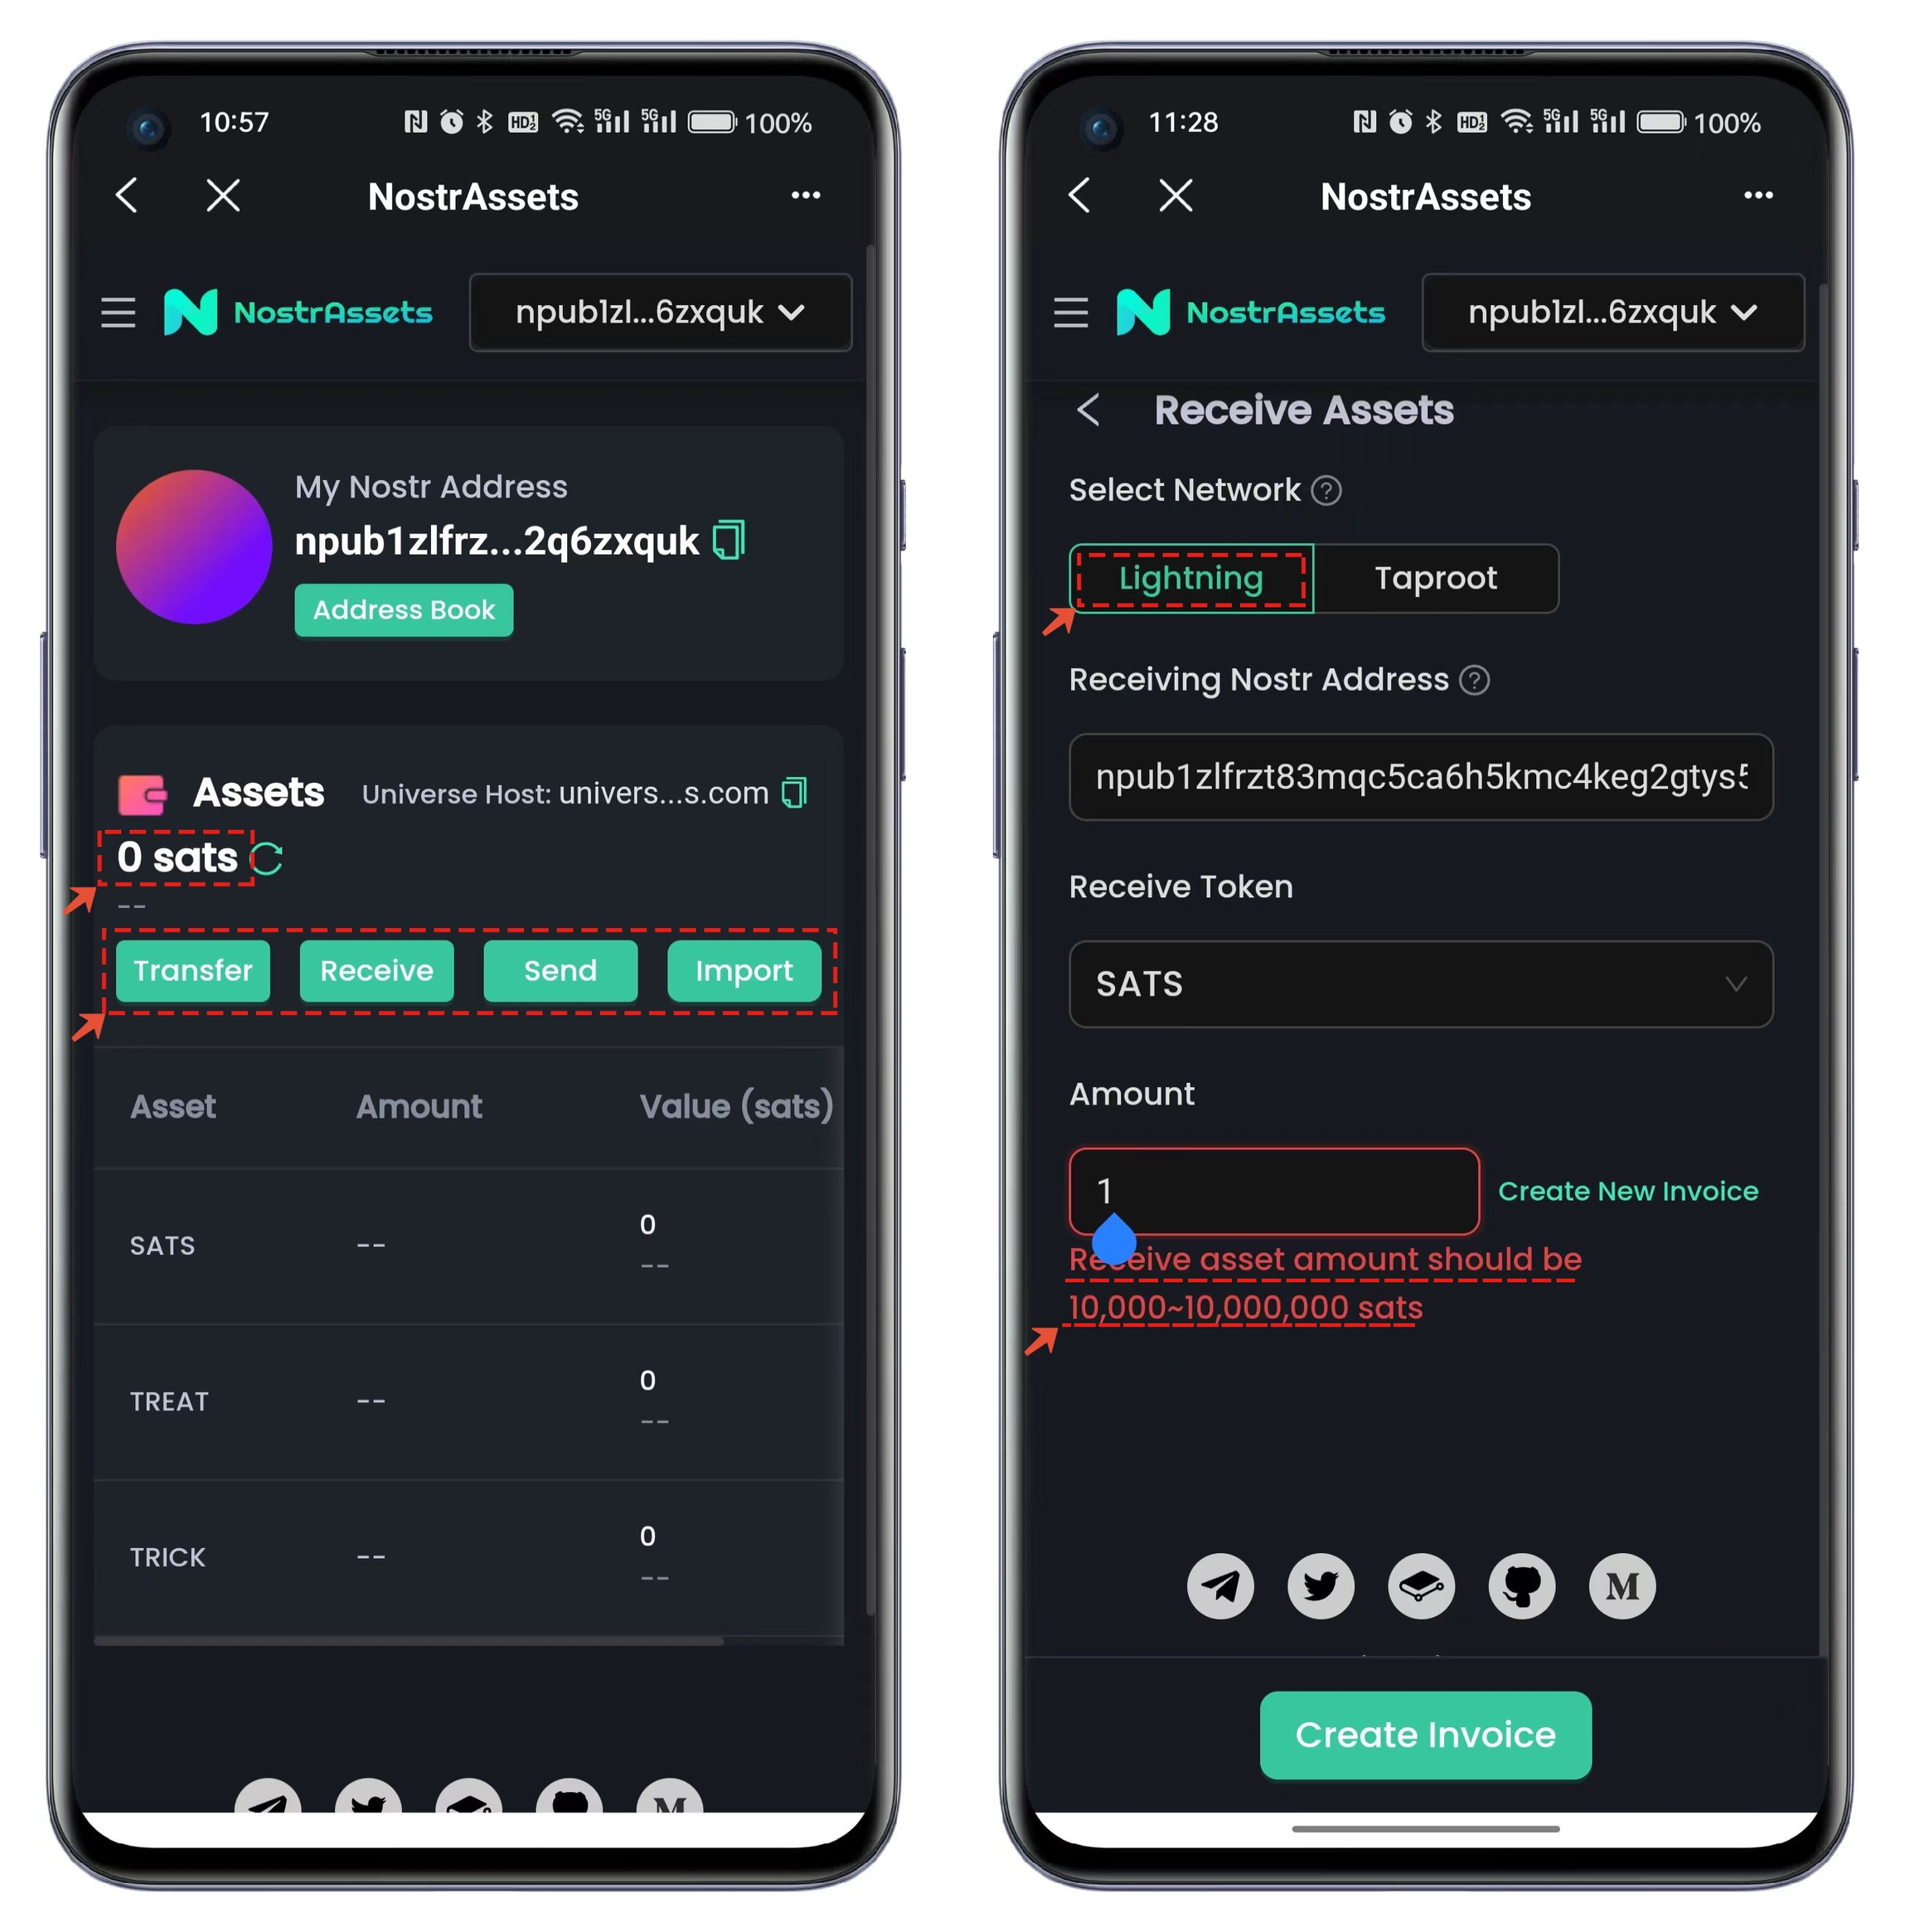
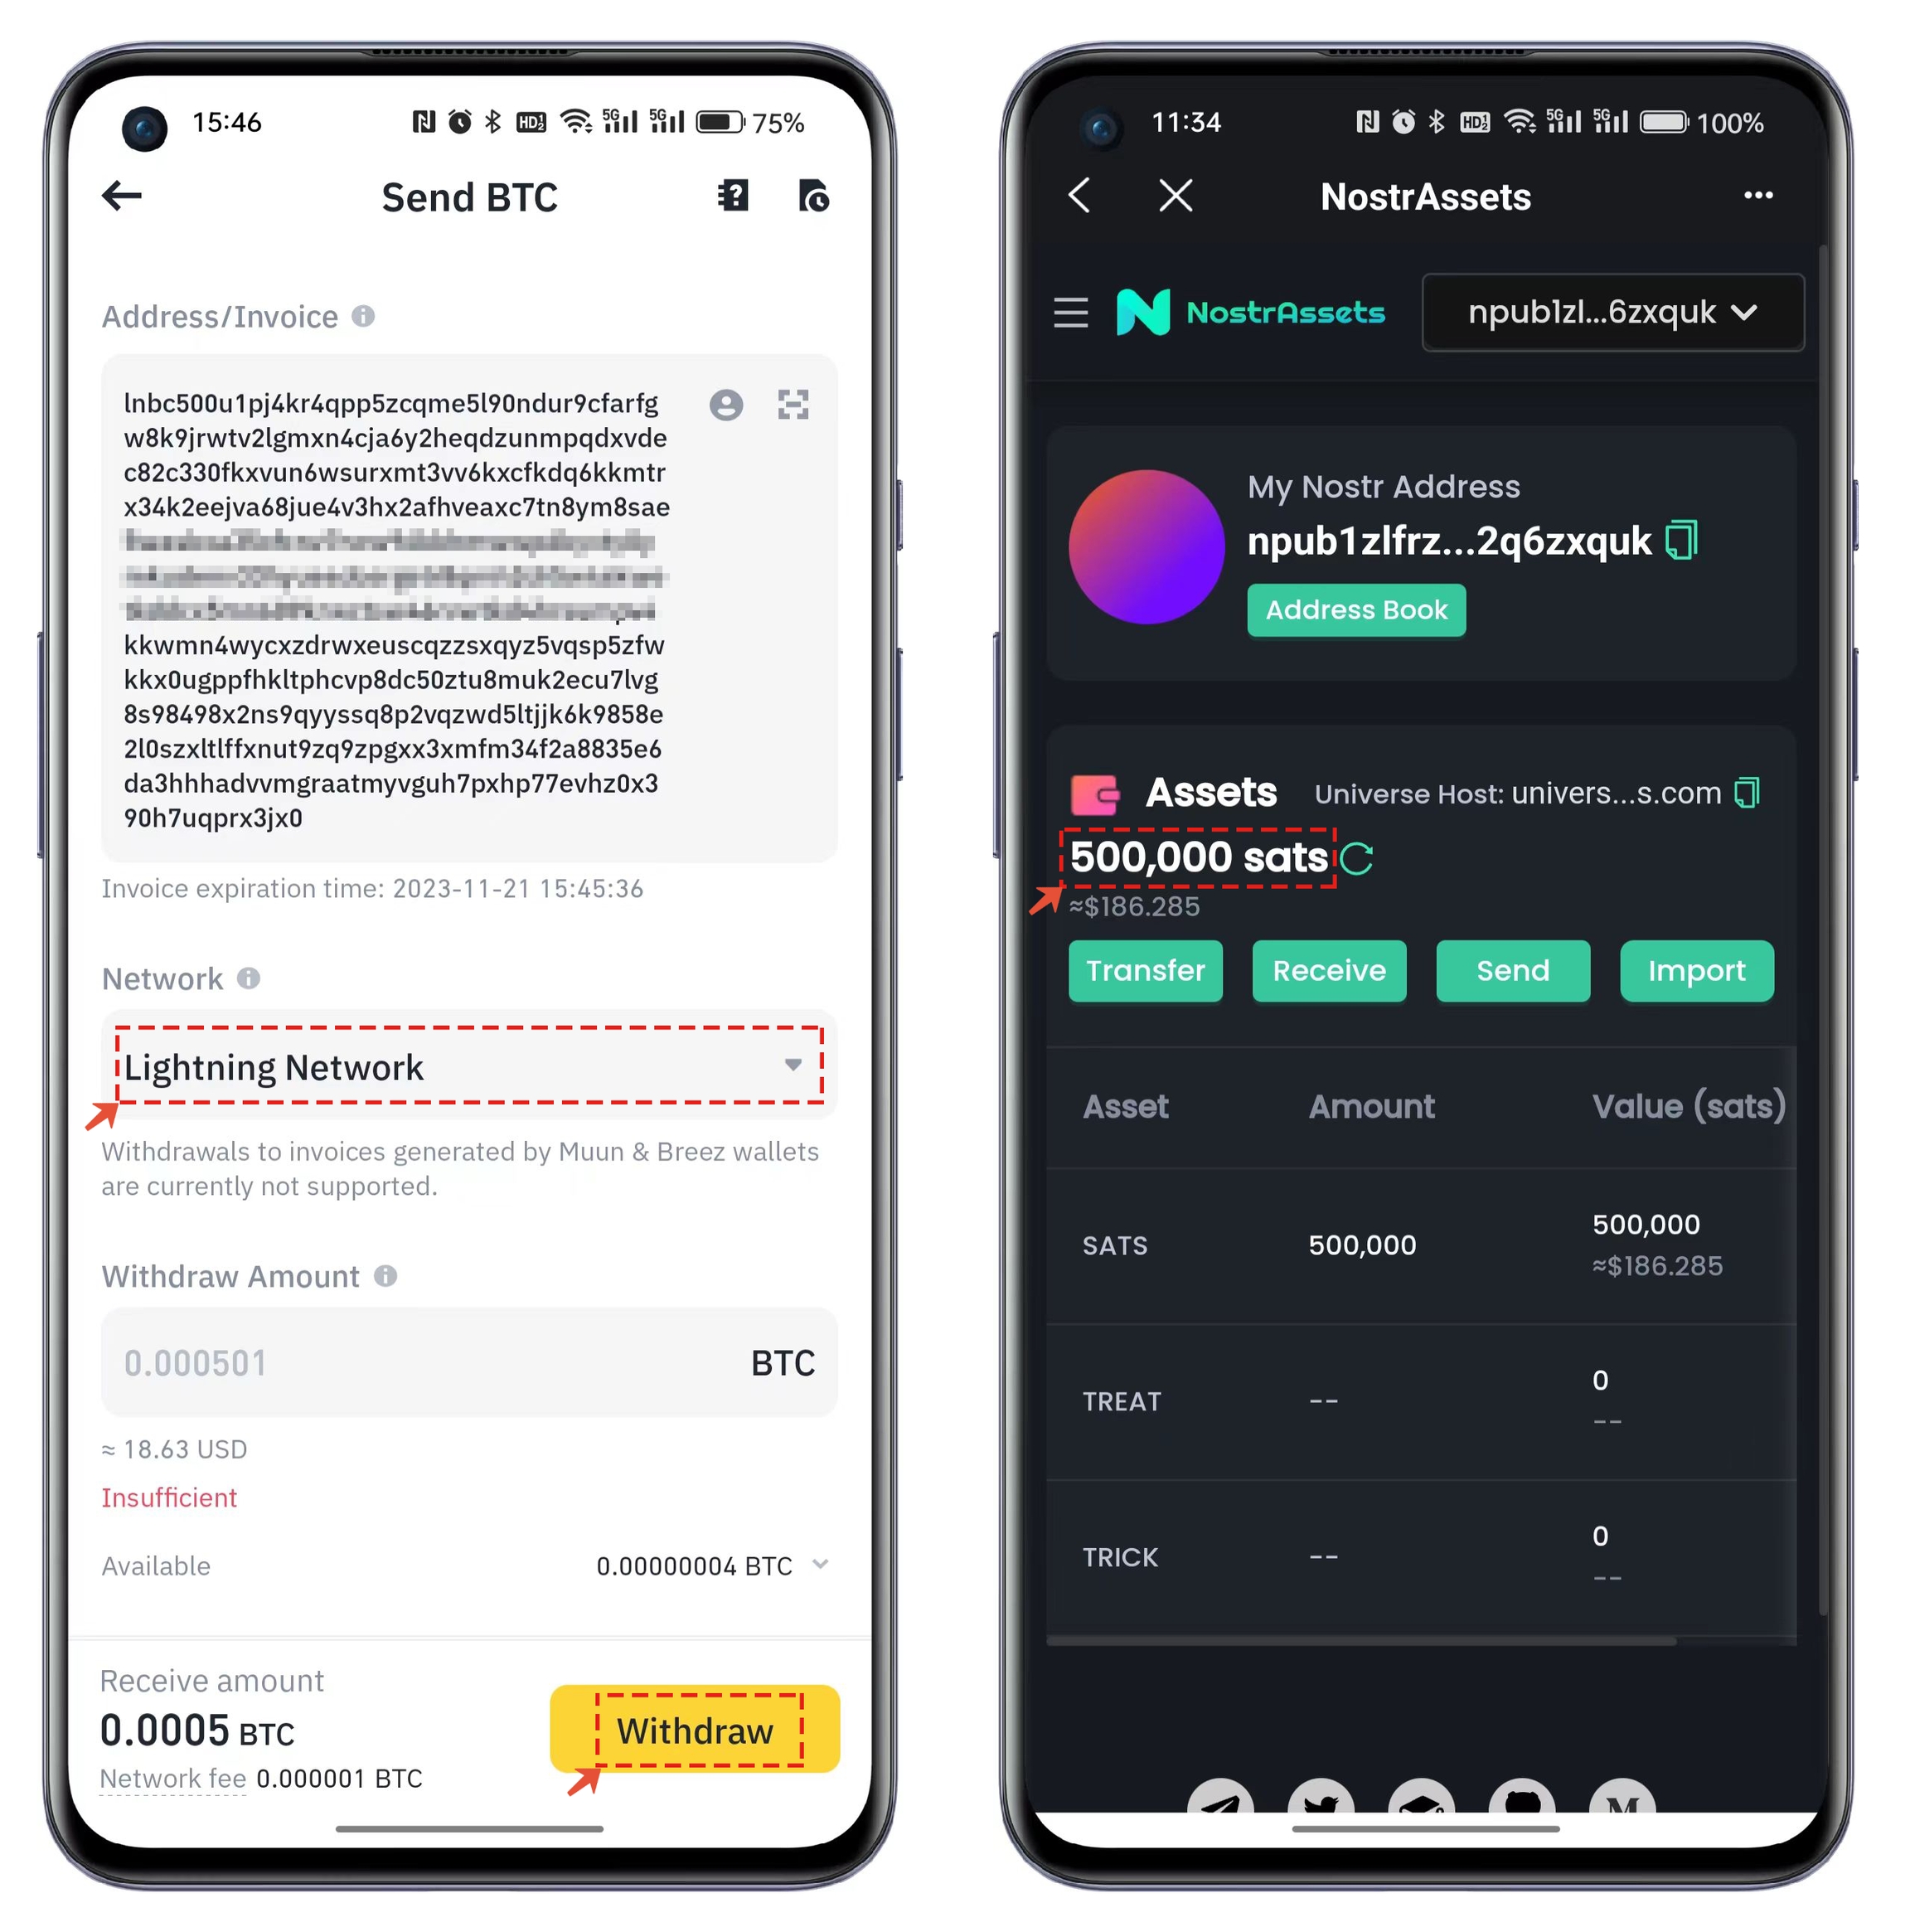
For the first-time user with a zero balance in holding sats, on the default displayed asset interface, you can choose the following functions:
[Transfer] for transfer functionality
[Receive] for receiving funds
[Send] for recharging
[Import] for importing.
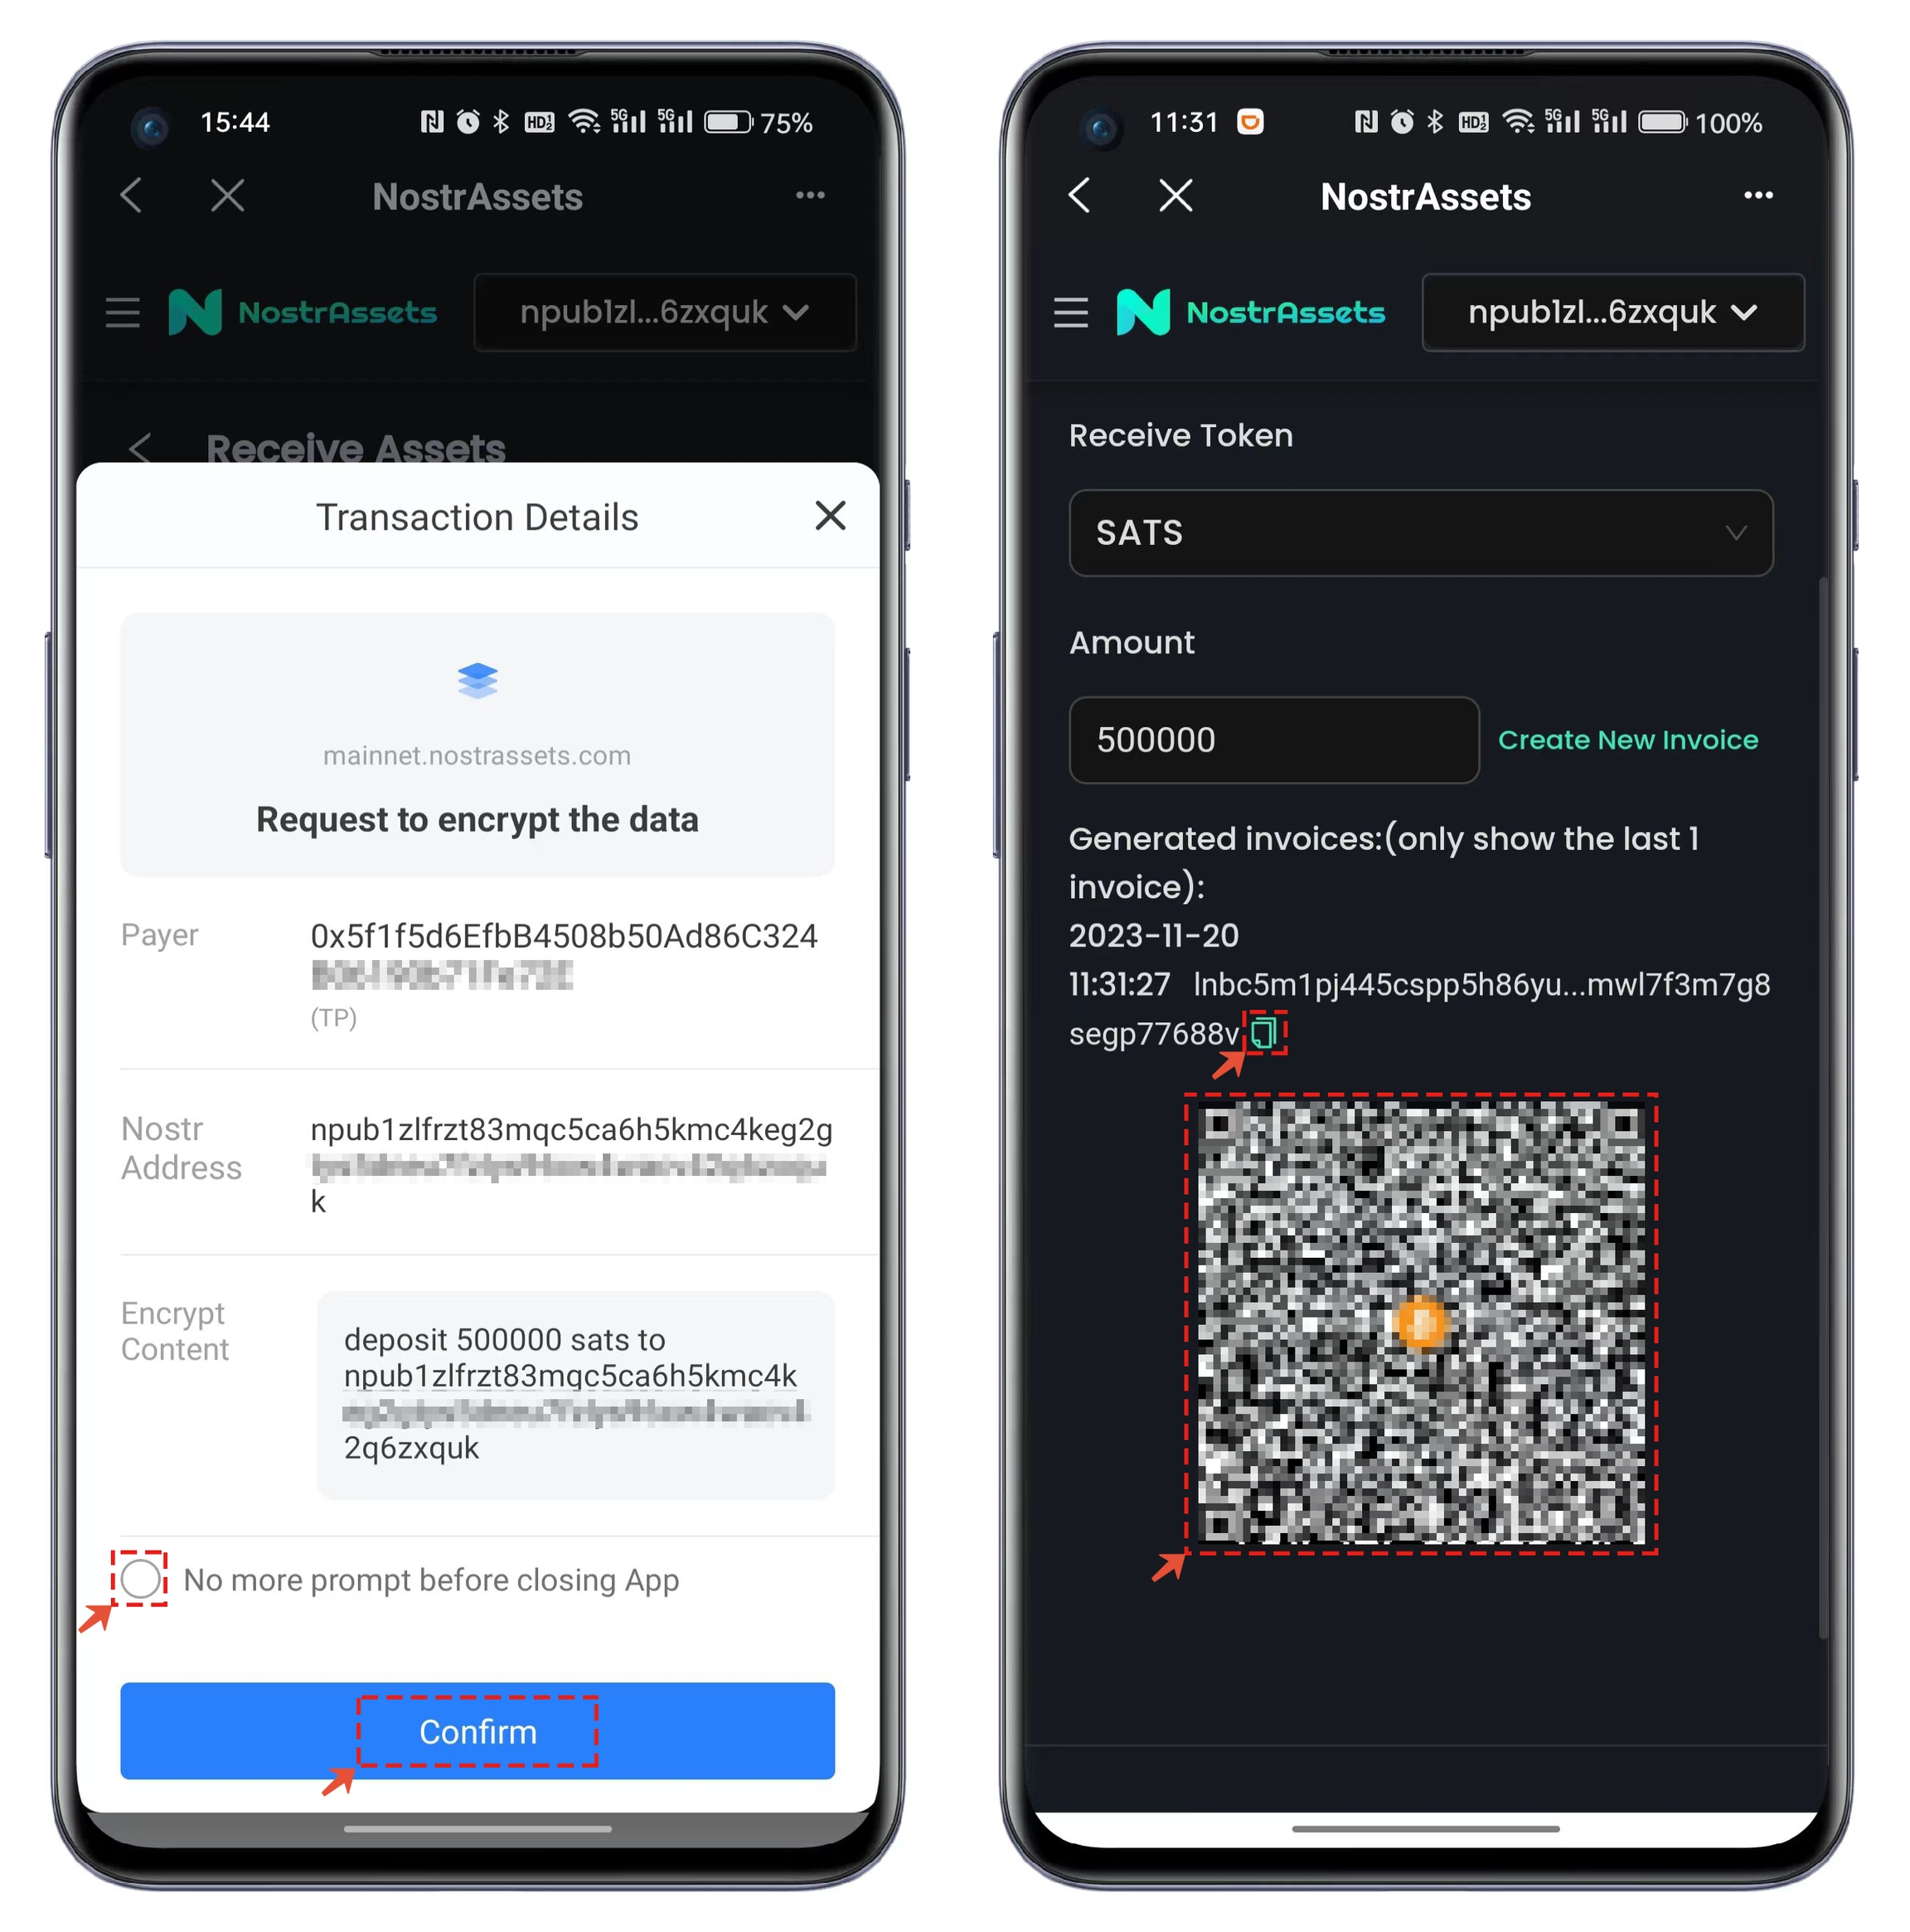
Clicking on [Receive] defaults to using [Lightning] network, and the recharge amount should be in the range of 10,000 to 10,000,000.
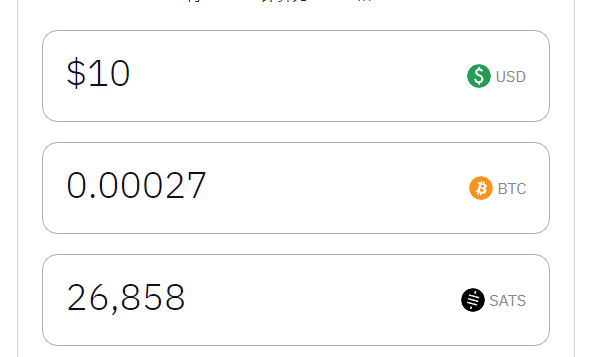
Satoshi is the smallest divisible unit of Bitcoin, representing 0.00000001 of a Bitcoin, which is equivalent to 100,000,000 units in one Bitcoin. Beginners may find it challenging to determine the appropriate recharge amount initially. In such cases, it is recommended to use online unit conversion tools available through a Google search for reference.
After confirming the recharge amount, click [Create Invoice] to generate an invoice. You need to [Apply for Data Encryption] to create a usable receiving invoice address and QR code. You can either copy the invoice address directly or use the displayed QR code for scanning.
Enter the invoice address into the withdrawal interface of the exchange. Make sure to choose to operate using [Lightning] for the Lightning Network. After the withdrawal is completed, wait a moment, and you will receive the withdrawn sats assets.
NostrAssets Deposit Tutorial:
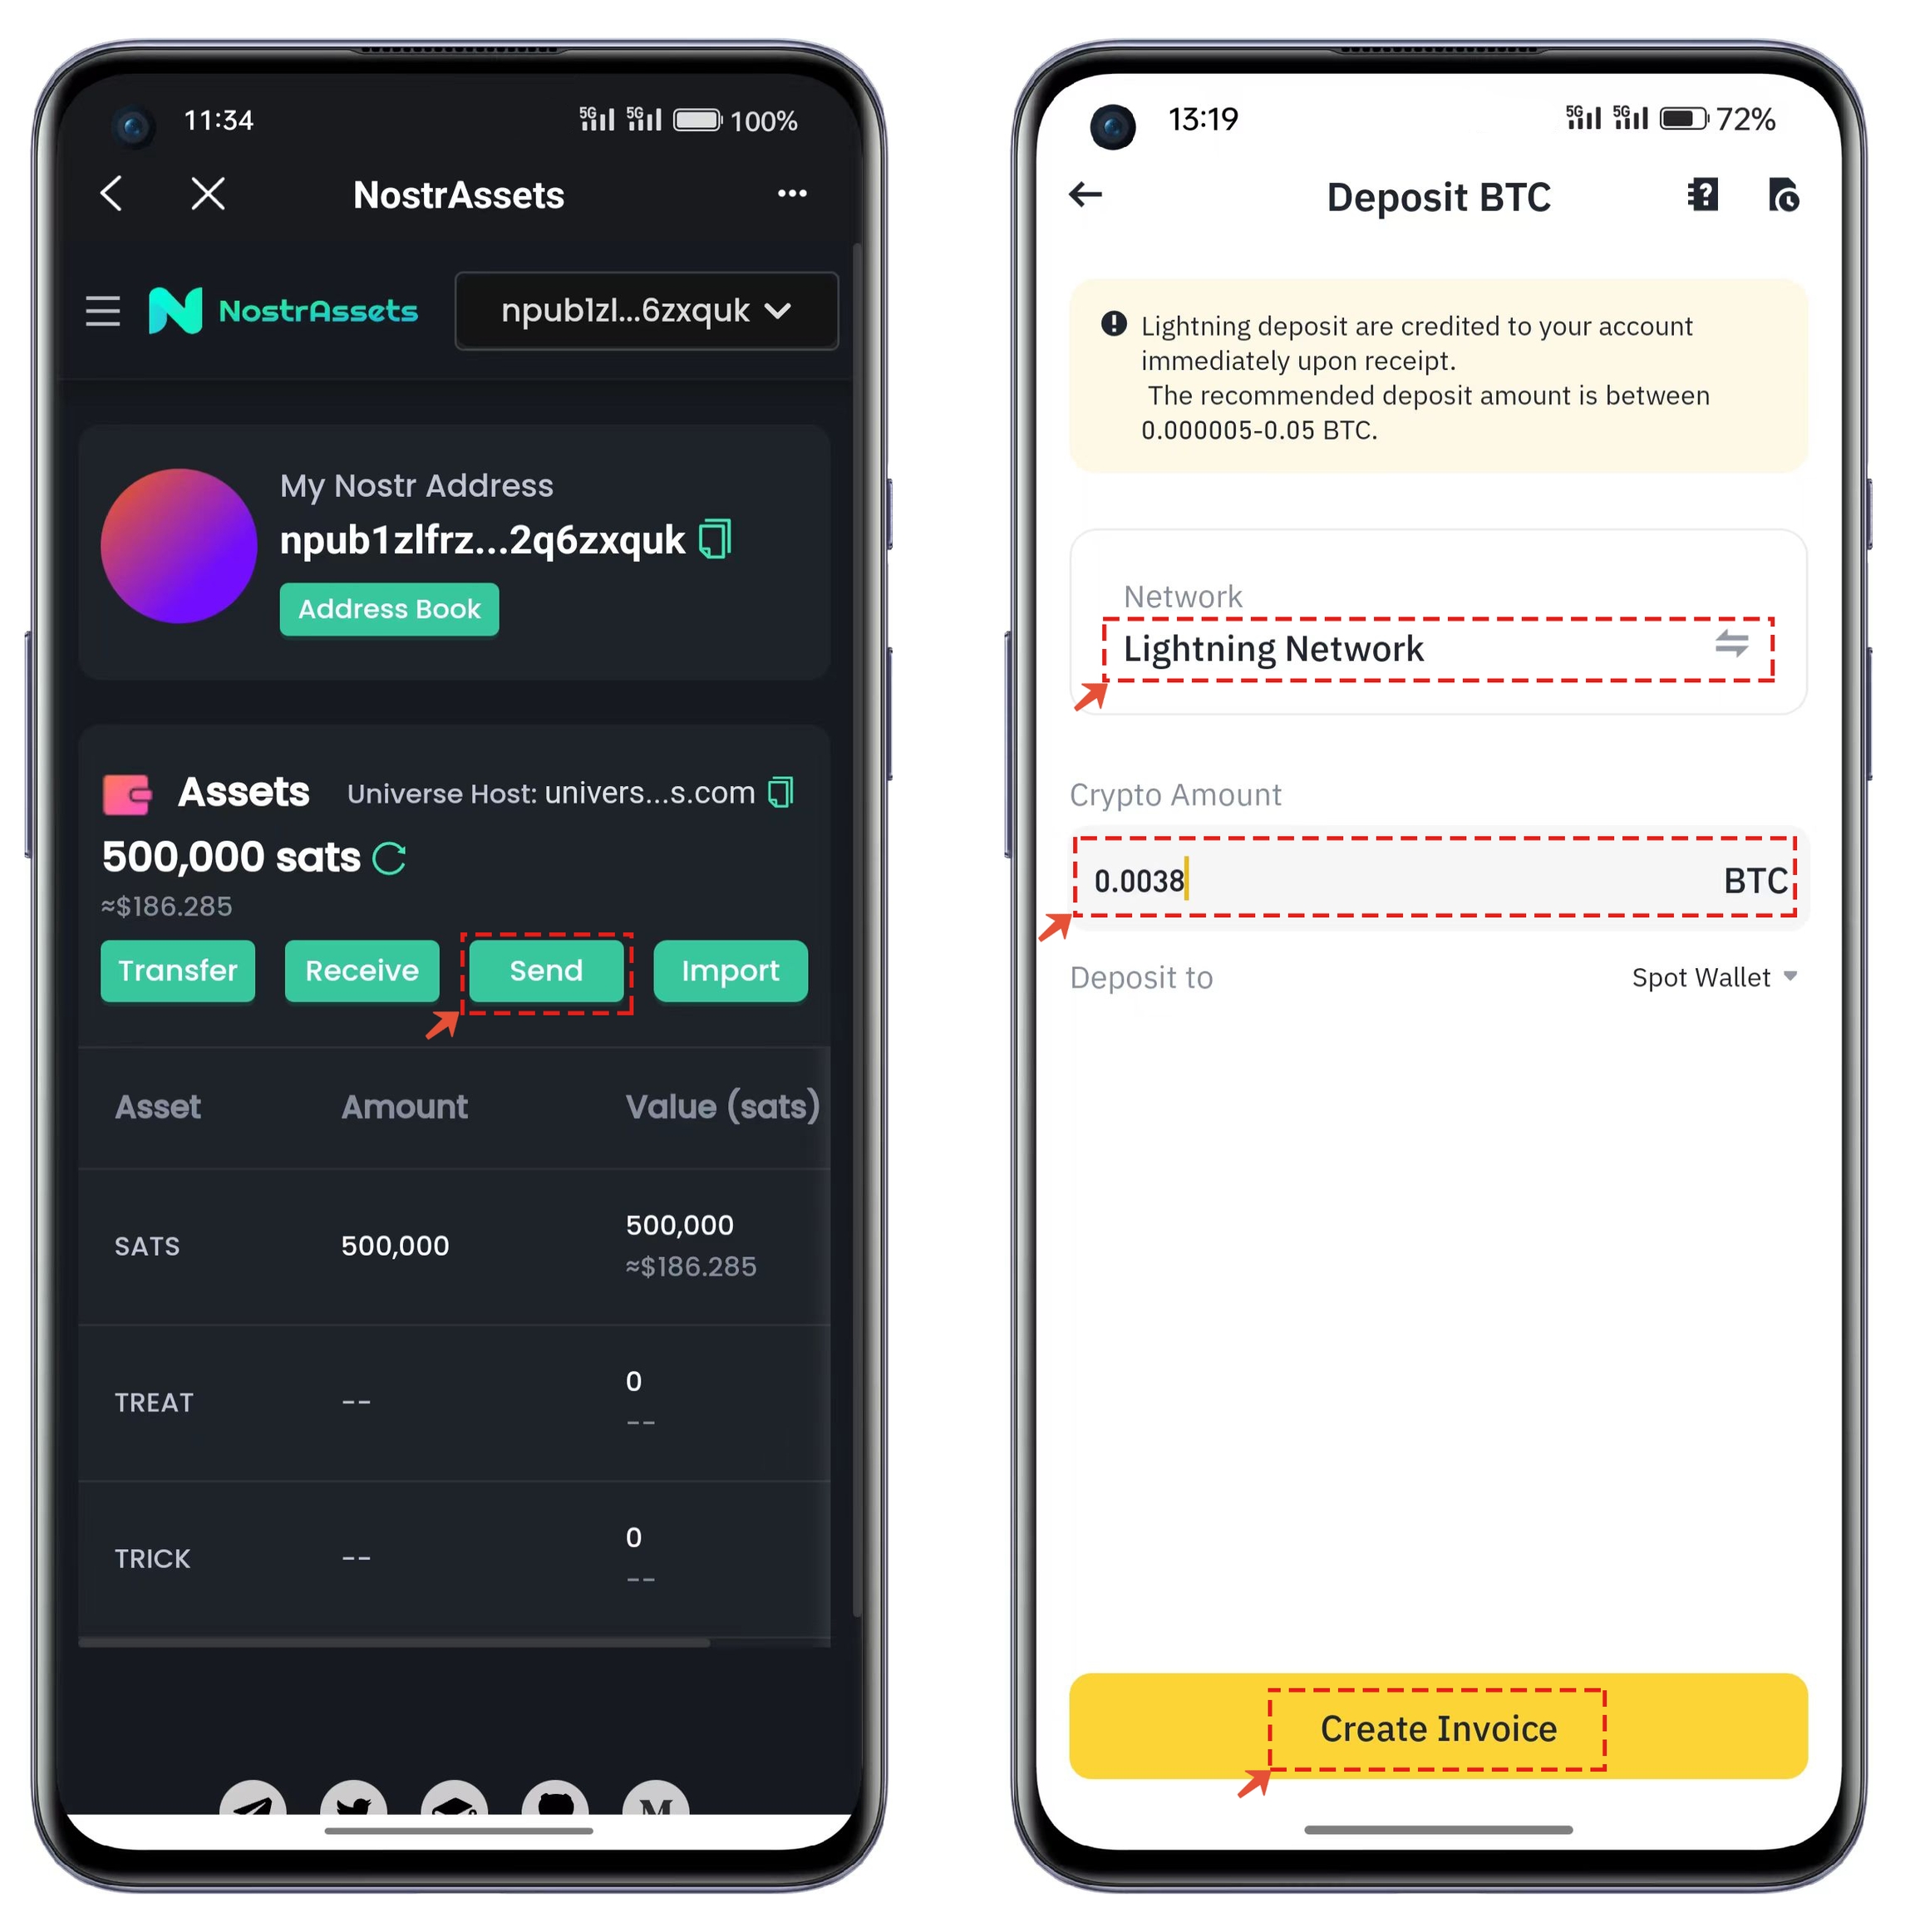
When we have completed our operation and need to recharge the remaining assets to the Binance exchange, we will use the [Send] function. Open the Binance exchange, select BTC recharge, and for the main network, be sure to choose [Lightning] network. After setting the quantity, click the bottom [Create Invoice] function.
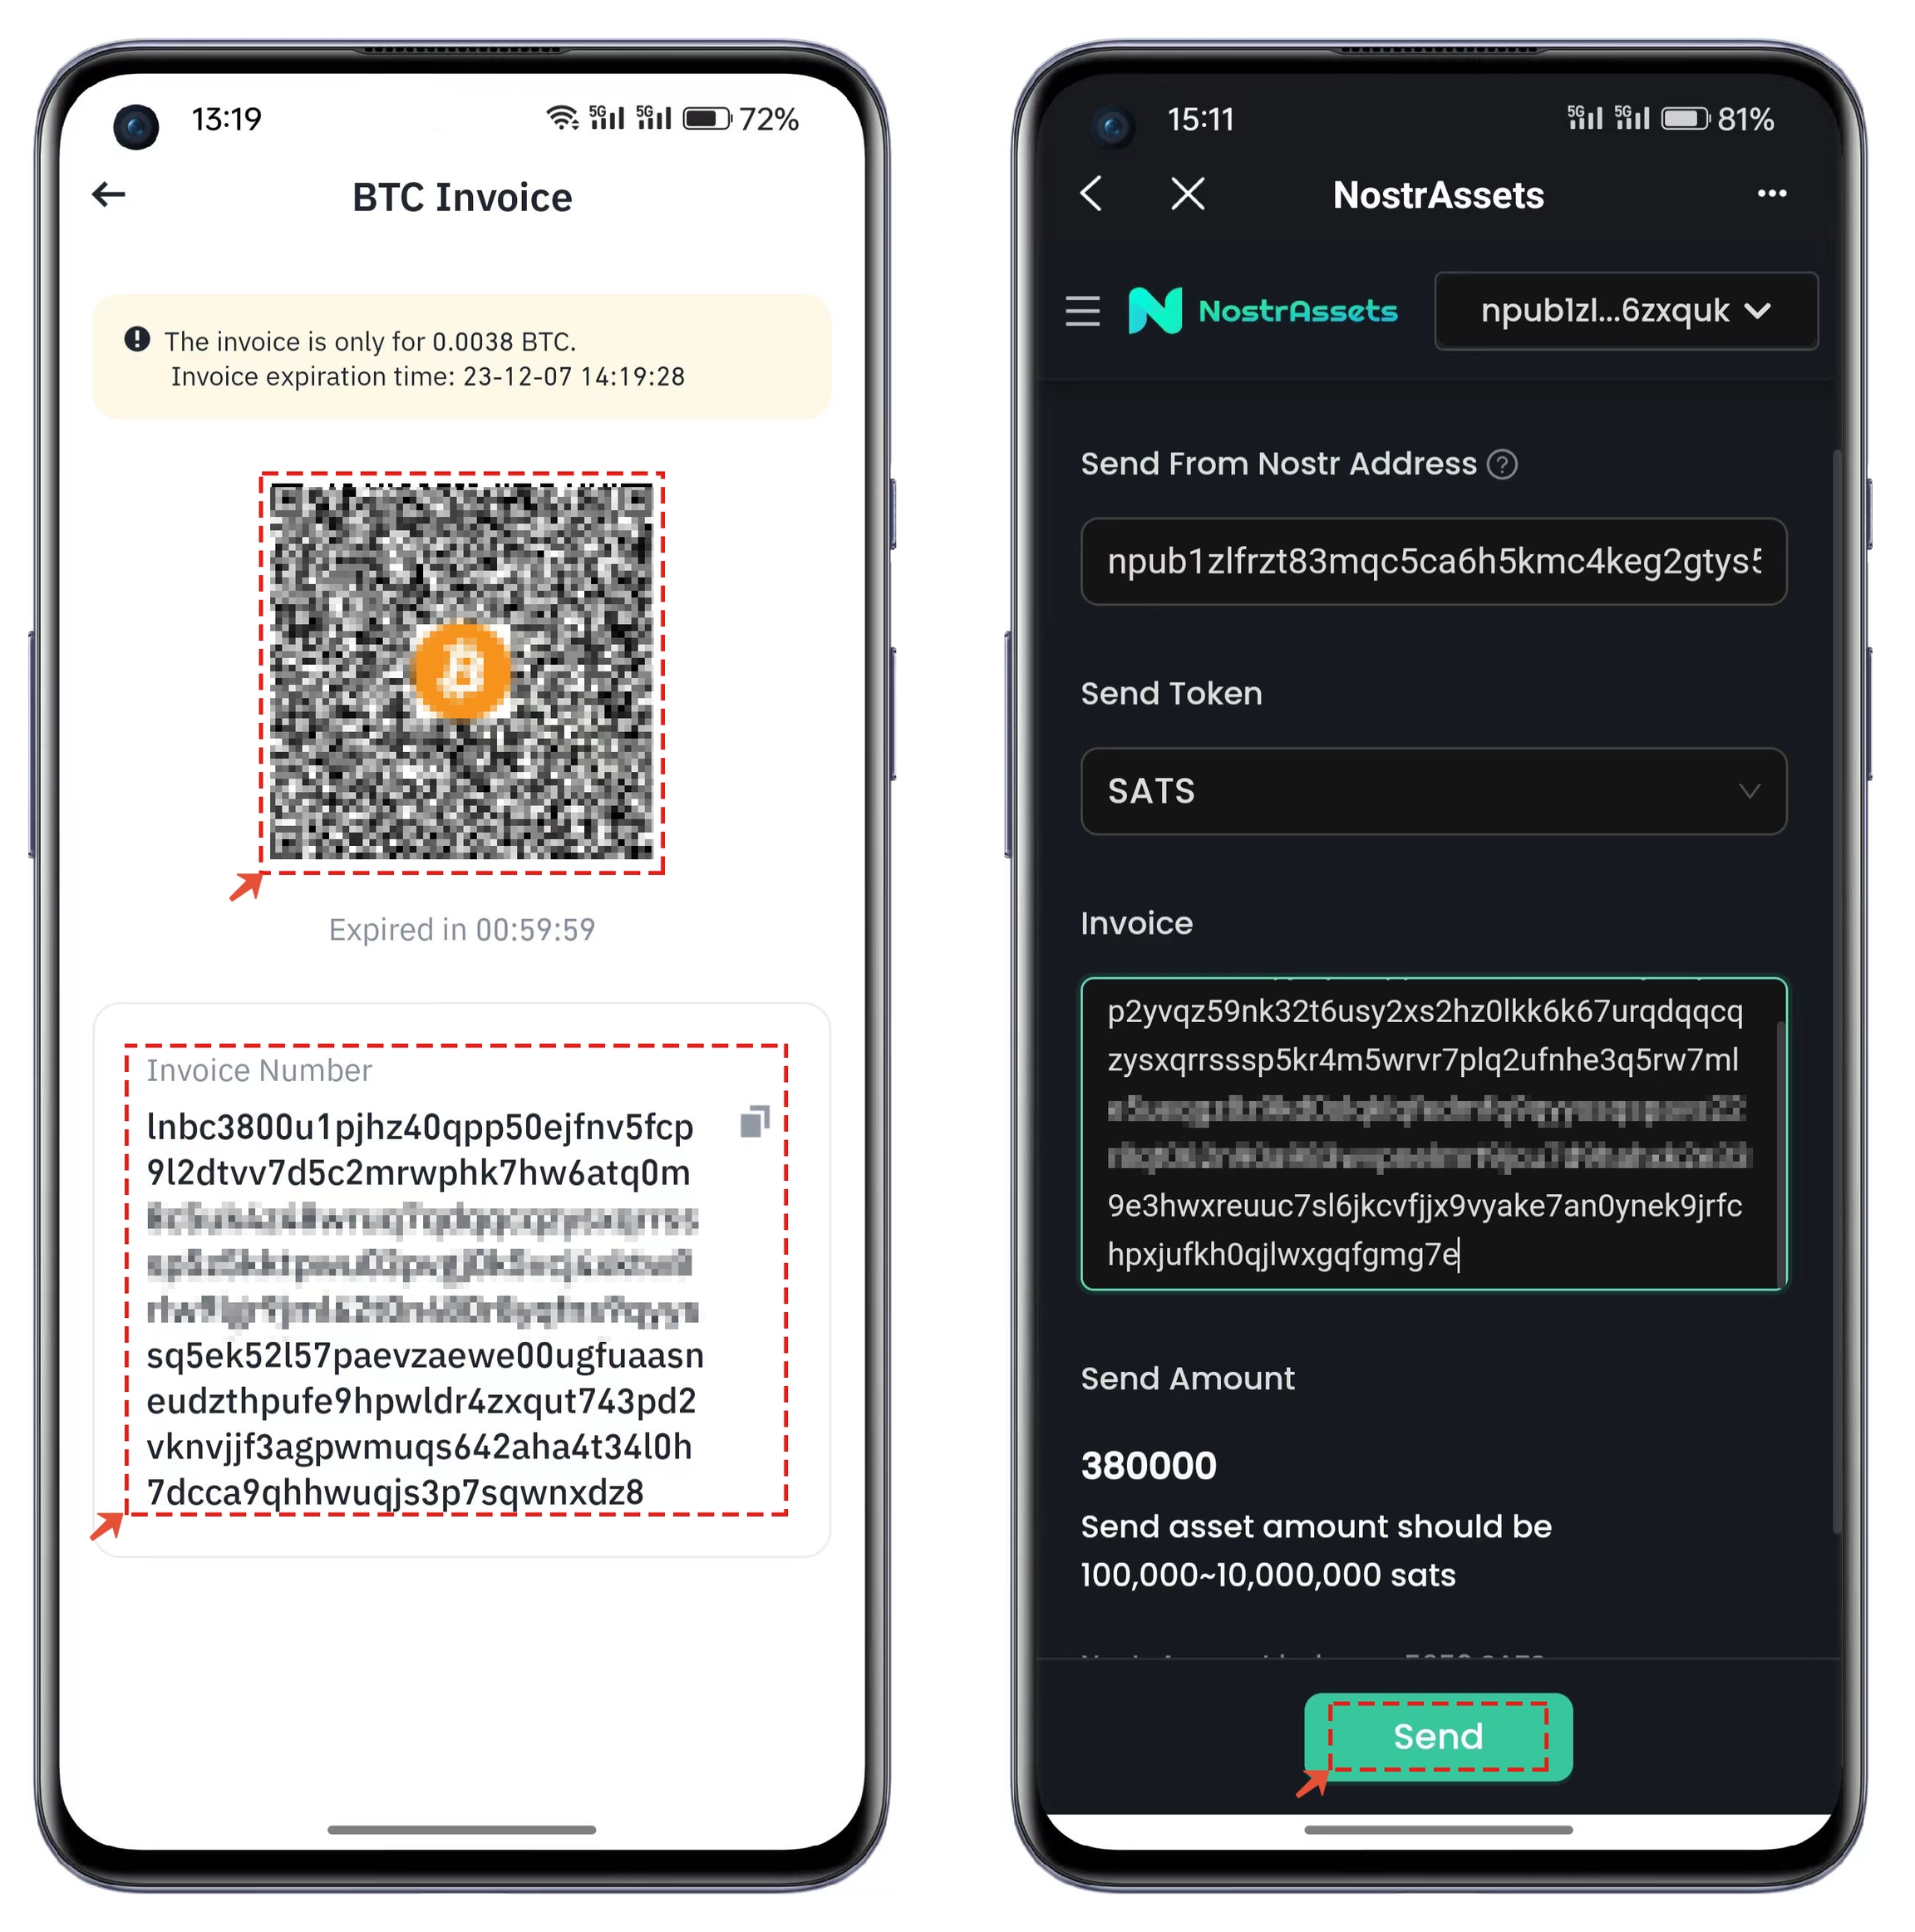
In the BTC invoice interface, copy the [Invoice Number], paste it into the NostrAssets Send interface, and click the bottom [Send] to complete the process of recharging assets to the exchange. Soon, you will receive the recharged BTC assets in the exchange.
最后更新于